Showing posts with label tutorial. Show all posts

Thursday, January 22, 2015

Duster Cardigan Sew Along w/ Mimi G

Hey Darlings! I so am happy to finally share one of my favorite projects so far...the floor length duster! I am going to make so many of these and wear them all the time, lol They are so comfy and fast to make. I have listed my suggested fabrics below along with a link to the pattern I am using to make the modifications and of course the sew-along video is below.

Fabrics: HERE is the one I am using for the video and HERE are some other great options. Don't forget to use my awesome code to get 10% off your fabric purchase "MIMI10"
Pattern: HERE NL#6735


xoxo
Mimi G


Wednesday, September 17, 2014

DIY Denim Skirt Sew Along + Distressing Video


Hi Darlings, Todays sew along is for a great, must have in your wardrobe, fall ready denim skirt. 
I chose a basic pattern that doesn't speak much but I knew with some Mimi G flare we could make that puppy sing.

I went with McCall 6361 View D and a great Stretch Denim found HERE. I also would love to make this skirt in THIS camouflage print and THIS floral. This skirt will work with any stretch denim fabric in THIS section.


xoxo
Mimi G

Wednesday, July 30, 2014

Simplicity Jumpsuit Sew-Along w/ Mimi G


Hi Darlings!

Everyone is making jumpsuits and rompers and since one of my favorite patterns for a jumpsuit is Simplicity 1355 we thought why not make a sew-along video with a modification. I wanted a narrow leg with a cropped look so I made a quick and easy adjustment which I show in the video. I hope you enjoy the video below and I will see you guys later!

Pattern: Simplicity 1355 HERE
Fabric Options: My fabric choice HERE, Challis HERE, Chambray HERE, Crepe HERE, Linen Knits HERE, Striped Knits HERE


xoxo,

Mimi G
www.mimigstyle.com

Thursday, May 22, 2014

DIY Swimsuit Tutorial w/ Mimi G

Hi Darlings,

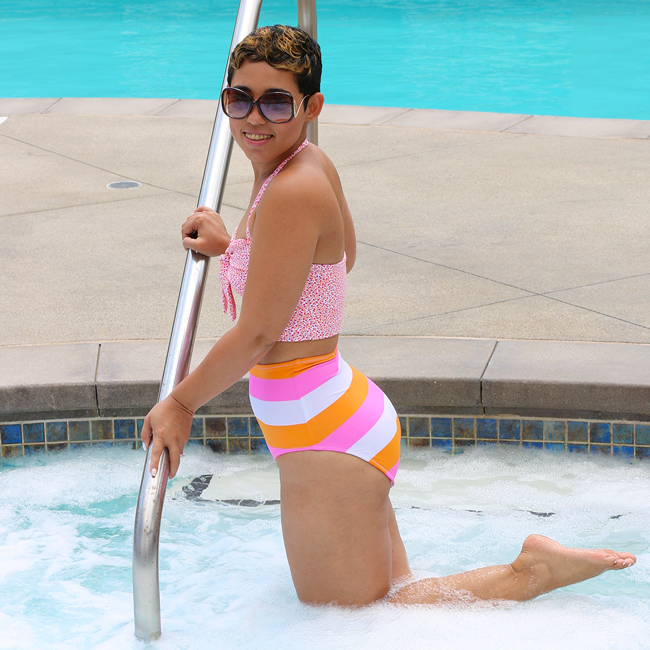
I am so excited about this sew along because I have been meaning to make a swimsuit since last year and I just never got around to it. When Michael Levine asked me what we were doing for May I immediately said SWIMSUIT, and since they have such a great selection of swimwear fabrics they were just as excited as I was! The tutorial is a modification using McCall Pattern 5400

I made one in a full cheetah print and I made the second swimsuit with coordinating fabrics. I have listed the Cheetah fabric HERE, the Floral HERE and the Stripes HERE. You can view SWIMWEAR PRINTS HERE and SOLIDS HERE. Make sure to use my coupon code for a little savings "MIMI10" You can also get the McCall Pattern HERE. Additional tools needed: Jersey Ballpoint Needles HERE (used when sewing with stretchy fabrics) French Curve (optional) HERE 


Monday, March 24, 2014

DIY Maxi Dress Tutorial! w/ Mimi G.


Hi Darlings!

Now that spring has arrived it is time to pull out those maxi dresses, or in my case MAKE some maxi dresses! Todays tutorial brought to you by Michael Levine is just that, a great and easy to make maxi dress. I have also taken some pics of a shorter version option if you want to make the dress above the knee.  

Fabric suggestions for this dress are light weight cottons or rayon blends such as these great RAYON PRINTS or these CHALLIS PRINTS. I used this BLACK CHALLIS  and this great TROPICAL PRINT. I also am totally in love with these TIE DYE GAUZE which will look amazing in this dress and of course if you want to use a great bright solid these SOLID GAUZE will work nicely. I hope you enjoy making this dress, and we can’t wait to see how yours turns out!


You can choose to make the dress any length you want and as shown below you can also skip the shoulder gathering too. The best thing about this dress is that depending on your fabric you can make it very casual and great for vacation attire or a little dressier for date night.


xoxo
Mimi G


Tuesday, December 17, 2013

Mimi G DIY Sequin Maxi Skirt TUTORIAL!!!

Hi Darlings!!

I had so much fun making and wearing these skirts and so will you after you watch my easy to follow, step by step video tutorial! I can't wait to see all the skirts you guys are going to make. The video tutorial is below along with my suggested fabrics, lining and noted tools used in the video.

SEQUIN FABRICS ARE ON SALE!!!


Suggested Fabrics: HEREHEREHERE & HEREHERE / Suggested Linings: HERE & HERE
No Sew Tape: HERE SA Curve: 5/8" HERE / Pattern Guide View: HERE


xoxo

Wednesday, November 27, 2013

Mimi G For Michael Levine: FREE DIY Carpet Tote Tutorial!


Tools:
  • 1 Yard Medium to Heavyweight Upholstery Fabric Like THIS, THIS, THIS or THIS
  • 1 Yard Lining 
  • 1/2 Yard Stiff Interfacing or SHAPERS (Shapers are the best thing ever, they can be use for so many things so it is always god to have a yard in your stash.
  • Old Belt or pre made Purse Handles found HERE (the thrift store is a great place to find belts that can be re purposed)
  • Thread/Pins/Chalk
  • Ruler /Scissors
  • Sewing Leather Needles & Universal Needle
Pattern Pieces:

Step 1. Cut 2 Pieces of Main Fabric 22" x 18 and cut out  3x3" corners as shown below

Step 2. Cut 2 Pieces exactly as you did for the main fabric

Step 3. Cut 2 Lining Facings 22x4" as shown below

Step 4. Iron under 1/2" on one long edge of the lining facing pieces and place right side up on top of lining (the non pressed edge will be on the top) This gives the top of the lining structure and gives the inside of the bag a nice finish.

Step 5. Pin it in place.


Step 6. Sew down the facing to the lining at the bottom and top of the lining pieces, do this for both lining pieces.

Step 7. Place lining pieces right sides together and sew across the bottom as shown below using a 1/2 seam allowance and leaving a 4.5" opening at the bottom of the lining.


Step 8. Sew the sides of the bag linings tog there using a 1/2" seam allowance. The sewn lining pieces should look like the image below. 


NOTE: You will construct the main fabric pieces for the bag in the same manner as the lining EXCEPT you will NOT leave an opening at the bottom of the main fabric pieces.

Step 9. Press open the sides seams of the lining pieces as shown below.

Step 10. Now we close out the cut out corners by bring both seams together as shown below, pin it and we will sew it closed using a 1/2" seam allowance.


Step 11. Sew the corners, set aside and sew the main fabric pieces together.


Step 12. When you are done sewing both the main fabric and lining set aside and turn the main fabric inside out.


Step 13. Cut out 2 pieces of Interfacing or shaper measuring 15x6" then sew or glue both layers together for extra stiffness.


Step 14. Cut a piece of fabric larger then the shaper as shown so you can cover it. With the right side of the fabric facing you place the shaper on top and fold up 2" of fabric. Then fold the other side on top. Pinch one end of the fabric and pull out the shaper. Pin the edges together and sew the short sides.


Step 15. Once you have sewn the sides turn the pocket right side out and insert the shaper.


Step 16. Cut your belt so you have two handles. The length of your handles is up to you.


Step 17. Now grab the main fabric bag and measure in from each side 7" and make a mark. Then place the one handle and mark the width (as shown below) do this on both sides.


Step 18. Place the lining over the bag so that right sides are facing.


Step 19. Pin both layers together at the top. I like to pin were I made my handle markings so that as I am sewing around I know where to start and stop. We will NOT be sewing the opening for each handle.


Step 20. Sew all the way around except for the opening for the handles.


Step 21. Pull the bag out through the hole in the bottom of the lining to turn the bag right sides out.


Step 22. When you have your bag turned right side out press the top of the bag.


 Step 22. Mark the belt handle 5/8" from the edge so you know how far to insert the handle into your bag so that they are both even. Sew across the top of the bag going REALLY SLOW over the leather. Make sure you are using your leather needles. I was able to sew through the thickness on my hoe sewing machine without a problem. Do this for all 4 openings.


Step 23.  hand stitch the opening in the bottom of the lining, lace the shaper inside and you are all done!





Thursday, November 7, 2013

A little Thanksgiving crafting...

Last week I decided I wanted to do a few crafts with the kids for Thanksgiving. We usually have lots of kids at Thanksgiving so I thought maybe I could find a craft they could do that would be good for multi age levels and not involve too many supplies. I came across two that I liked.
The first one is from Kate at
These little turkey pom poms looked perfect for my 6 year old. All I needed was felt, a glue gun, pipe cleaners, googlie eyes, and a skein of yarn. Sarah & I decided to test them out today.

      
Always read the directions first. This is not something most 6 year olds want to do, but we got through it. LOL!


Making the pom pom.


Tracing her hand.

Sarah's turkey!


This project was really simple & fun for Sarah. She did need some assistance, but if you have a teen  cousins around they can easily assist. If you really wanted to be crafty, you could make them ahead of time as place holders. The table would look super cute with one of these pom poms of each guest napkin or plate. Sarah wanted to write her name on each finger. I'm sure she would have loved a few foil embellishments to decorate her turkey. This craft is a winner if you need to keep kids busy before the turkey is served. Sarah gave it a thumbs up. To find more detailed directions click here

The second craft we tried out today was created by Lisa Storms. This no sew project was a little too hard for my 6 ear old, but I think most 8 year olds would be fine. For this project you need felt, polar fleece, and some stuffing.


Making the template.
            

Cutting this basketball fleece I found at The Loft. The colors were perfect so I got it. I'm hoping once it is cut & tied the basketballs will be less noticeable.

Holding the smaller template in place to cut the strips.

After tying, stuffing, and cutting a few pieces of felt here is our turkey. I think I may make a larger one as well. They will look cute together on my mantle. 

Click here for the template and more detailed directions.


Enjoy!