Friday, February 24, 2012

Cutting Your Own Bias Tape Made Simple - Plus an Easy Baby BlanketTutorial!

We want to share a simple baby blanket tutorial with you. It features a phenomenal trick for cutting your own bias tape! This method works great with a rotary cutter, and with a little "origami-know how", it allows you to simply make bias-cut blanket edging from your own choice of decorative fabrics!

First we'll start with the bias tape. Begin with a large square piece of fabric. Most quilting fabrics are 45" wide , so to get a square piece you'll want the length to be 45" also, or 1-1/4 yard. Either way, just make sure that the length and width of the fabric you are using are equal lengths. Cut edges should be squared (90°) with the selvedges.
Step one: Find the center of the square. You can do this by folding the fabric in half twice (see grey lines) and marking their intersection with a pin. Step two: Fold corners inward, to meet the centerpoint.
Next, rotate your fabric 45 degrees so that it is a square in front of you, rather than a diamond, and use a rotary cutter and straight edge to slice strips. These strips are now naturally cut on the bias!
We used 1-1/2" wide strips, with 1/4" seams, and it yielded a 1/2" wide border.


To prepare your new bias tape for application, press it in half lengthwise, like this, and it's ready to go. A yard and a quarter of 45" wide material will yield more than enough bias tape for a 45" x 45" blanket. You may have to do some math for other sizes and uses, as we haven't created a formula yet! :D
Now for the blanket itself. You will need two large, square pieces of fabric, plus any batting or lining you choose to put in between. For this tutorial we chose the new Karavan Collection, from Free Spirit by Valori Wells, plus two accent materials, the green one being for the bias trim. But we also have an expansive collection of other quilting cottons here.

Sandwich the batting between the two blanket fabrics, right sides facing out, and pin. Use a circular object (like a saucer or a glass), and mark rounded corners; then trim. This cuts out the work of beveling or folding bias tape at corners, so you can just curve right around those edges with your curve-friendly bias tape!
Now, quilt the fabric as you like, stitching through all three layers. You can quilt along the printed pattern on the cloth, or rectangular shapes, triangles, zig-zags, swirls, flowers, spirals, or vertical lines. You can hand quilt, or use sashiko thread and use big stitches. Just remember that this quilting is only being used to keep those three layers together and in tact, plus it can be decorative and attractive.  Make sure your layers haven't shifted; if there are some threads or a little unevenness, now is the time to trim the edges.

The last step is to attach your bias tape. Now there are so many tutorials on the web (YouTube, for one, is a great resource), I am going to link you to this one here (just ignore the part about beveling the corners, because we rounded the edges a few steps back) and I'll wait for you here and then carry on with the rest of my tutorial when you get back... some hand stitching will be required but if you minded that, you wouldn't be a quilter now, would you?!? ~Wink Wink~

Once you've put on your bias tape, you've got an attractive and tidy little blanket to bundle up some joy in! This is an easy and personalized project.  For a baby shower, tie this up with a nice piece of satin or grosgrain ribbon and you can forget about those gift registries!

Wednesday, February 15, 2012

Michael Levine's Special Kona Cotton Solids Sale for Online CustomersOnly!

Now is a great time to shed some light on the ever popular Kona Cotton, a staple broadcloth material amongst quilters and crafters for it's universal appeal and large spectrum of colors. This weekend we'll be having a sale online on all of our Kona Cotton Solids, so we wanted to share some ideas and pictures.


In case you are unfamiliar with broadcloth, it is characterized by a dense weave, which lends itself to sturdiness and long term durability. So as you can imagine, quilters choose this material for its ability to hold up to many washings and time, as quilts are traditionally handed down through families and generations as long lasting heirlooms. Not to mention the fact that it is 100% Cotton. If you know me well enough by now, you know that I am a huge advocate of natural fibers, especially for worn or slept-in items. I think blankets qualify. Nobody likes waking up clammy or damp. A material like Kona Cotton will give you the vibrant colors and long-term durability, paired with the added benefit of being a breathable, natural fiber that will ensure a comfortable sleep.

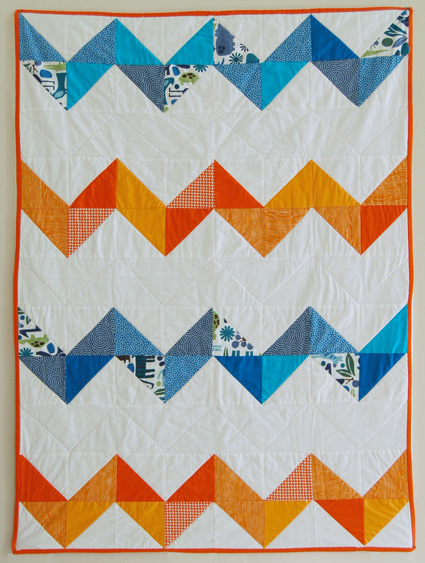
There are a ton of online tutorials and quilt patterns if you'd like to try your hand at a Kona Cotton Quilt. The most elaborate designs use analogous colors to create dimensional and gradated patterns.  This one here is an interesting take on a classic chevron. I like the simple instructions drawn out on graph paper, very clear:


Another notable, somewhat retro, design using Kona Cotton can be seen here. Or the Shattered Rainbow,which is here. The possibilities are endless. Just do an online 'image' search for "Kona Cotton Quilt" and you'll be overwhelmed by choices.

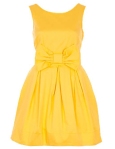
But you aren't only limited to quilts with Kona Cottons, I imagine them working wonderfully in both children's garments or women's dresses and skirts. And as the examples show, Kona Cotton works great for making bows and other semi-rigid items. You can also use a Kona Cotton Solid for any of the components in our pillowcase blog or the potato bag blog. Here are a few photos of garments that could easily be replicated using Kona Cotton Solids as the main fabric or contrast:
    

Whatever you decide to do or make with the Kona Cotton, it's bound to yield pleasing results, and this weekend is a great time to stock up during our Kona Cotton Solids Sale!

Tuesday, February 14, 2012

Look Who Visited Michael Levine's - Marcy Tilton!

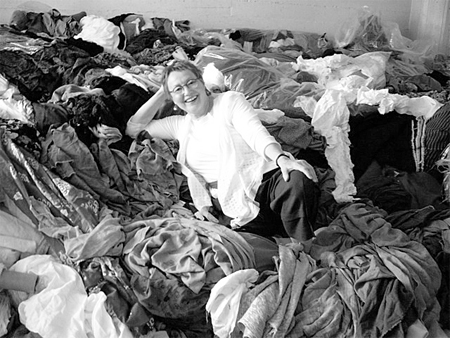
Earlier this month I had the pleasure of meeting long-time designer and sewing world celebrity Marcy Tilton. Although I didn't realize at the moment 'who' she was, when Marcy handed me her business card the name rang very familiar... I later realized Marcy's name was famous to me from her work with Vogue Patterns. Aside from designing patterns, Marcy blogs and hosts a variety of workshops, classes, and tours - among them an exciting trip to Paris' left bank in May 2012, suitably called 'Paris Tilton!'


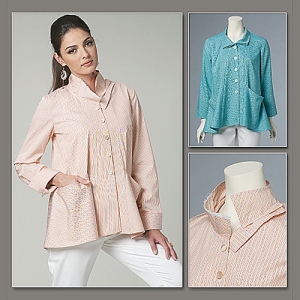
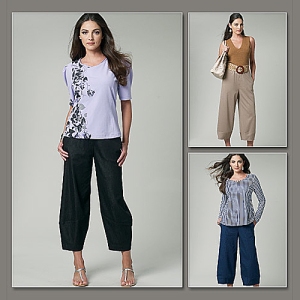
What I love about Marcy's patterns is that they are all any-age appropriate, and if you've got an eye for classic styling and cuts, you will appreciate them. We've just recently added a nice selection to www.LowPriceFabric.com.  My 'Top 3' favorite Marcy Tilton patterns are these:

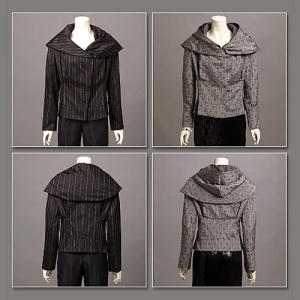
This asymmetric top/jacket (appropriate for all ages, and would be cute lengthened as a trapeze coat-dress!):


These cropped trousers (suitable for any woven fabric and so easy to pair up - you could dress these up or down, night or day! Plus there are three style variations):


And this asymmetric urban jacket (with so many different fabric options, it's easy to get excited about it!):

It's always refreshing to meet creative people who have found success doing what they love and who are just as interested in others' work as their own. Marcy was very kind and intrigued by our operations and endeavors here. I highly recommend reading Marcy's dissertation on fabric shopping, full of practical tips, found here. I hope you will pay a visit to our section dedicated to Marcy's patterns; I'm sure you'll find one that strikes your fancy. And who knows, maybe one of you will end up meeting Marcy in Paris!

Tuesday, February 7, 2012

Michael Levine's Sweetens the Deal: Low Price Valentine's Crafting Supplies and Valentine's Day Projects!

Valentine's Day and the month of February is always the time of year that we reflect on love and the special people we've been blessed with in life. Although many people would argue that Valentine's Day is a Hallmark holiday, that could be said for any holiday. The true values of a celebrated day are becoming more and more clouded by the commercial world. Crafting, however, and making gifts from your heart are a sure way to hold onto what's real and meaningful on Valentine's Day, and what is priceless and cannot be bought: LOVE.

I'd like to share a couple of projects I've come across or made myself, that are prime examples of a perfect Valentine. You don't even have to make anything functional; throwing together some nice materials in an artistic way with a lovely sentiment attached is really all you need to show somebody your admiration.

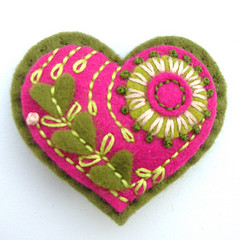
The first idea comes from Designed by Jane, and was featured on my previous blog entry about felt:
I just think this is so adorable and every little stitch and detail shows dedication and time. You could very easily embroider a sweet message onto the back - and voilĂ ! Love delivered! You can shop our collection of eco-friendly felt, perfect for a variety of holiday crafts, here.

My next suggestion is something for the kids. My mother always supervised the making of home-made valentines for us to distribute to our classmates. Heart shaped doilies, Valentine's fabric, some lace trim, red and pink construction paper, pinking shears, a bottle of Fabri-tac, and perhaps a little glitter is all kids really need to get crafty and show some love to their classmates. When I think of store-bought Valentines, I think of that song "Can't Buy Me Love." There's just so much more dedication and affection that come with home-made Valentines. Plus, kids will love crafting their own Valentines, it will keep them out of your hair for an hour or two, and every one is happy! These are just a few of the many Valentine's items we at Michael Levine's have just added to our online store, www.LowPriceFabric.com!

      
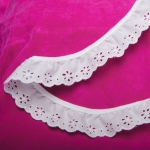
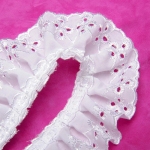
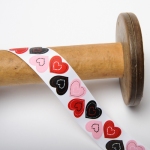
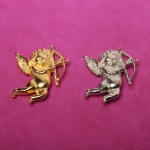
Another idea comes from my previous blog about Personalized Pillow Cases. It would be very easy to adapt this project and incorporate some of our Valentine's Day Fabrics and possibly use some of our eyelet trims instead of piping. You could even tie it up for presentation with one of our decorative ribbons and top it off with an adorable Cupid Brooch:

      
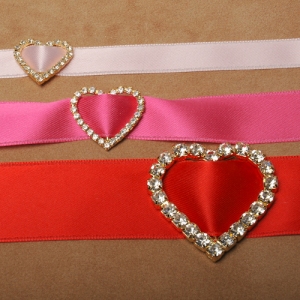
One more thing for the kids - or anybody for that matter - is a simple ribbon bracelet accented with a 'diamond' heart charm. You could add a clasp and it's done!
This last project - I cannot take credit for, but - is certainly worth highlighting, is this lovely Heart-Shaped Mailbox for Valentine's Day deliveries. This is a great idea for kids or teachers who want a fancy little place to receive their Valentines.
Again, this project would be a nice use for many of our Valentine fabrics (some are priced as low as $4.00 a yard!), and you could always trade out the scalloped edge for some lace or eyelet trim!
      
So whatever your Valentine's Day plans are, and whoever receives your affection on this special day of love, hopefully you'll find a place in your heart for some good, old-fashioned meaningful home-made gifts! And if not, if Valentine's Day just isn't your thing, you can always show some love for Arizona, whose Centennial Celebration of Statehood is this February 14!