Thursday, November 28, 2013

We want to hear from you...


We hope you have a wonderful day with your family! Don't forget we have an amazing sale going on for the next 5 days.


It's a great time to stock up on your basics, get anything you need for your New Years Eve look, or get fabrics for you diy holiday gifts. Whatever your in the mood for you can't beat these prices!


As we get ready to start 2014 we're reflecting on this year. We're so thankful for all our followers and shoppers. We have had tremendous growth this year and we feel so blessed by that, but we also know to keep growing we have to always be looking at what we're doing and what we could be doing better. Please take  a minute, comment below, and tell us what you want to see on our site and blog in the new year. Your opinion matters to us. We want to be your one stop shop, weather you visit our retail store front in Los Angeles or you shop us online.  From the comments below we will pick one lucky winner* and send them a goodie bag of fabric. We will announce the winner here on December 23rd. (*Remember you must follow this blog to win)

Again, have a wonderful Thanksgiving. Enjoy your family, some delicious food, and than do some shopping!

Enjoy!

UPDATE: We would like yo thank everyone so much for the lovely comments and feedback! The winner is announced in today's post!


Wednesday, November 27, 2013

Mimi G For Michael Levine: FREE DIY Carpet Tote Tutorial!


Tools:
  • 1 Yard Medium to Heavyweight Upholstery Fabric Like THIS, THIS, THIS or THIS
  • 1 Yard Lining 
  • 1/2 Yard Stiff Interfacing or SHAPERS (Shapers are the best thing ever, they can be use for so many things so it is always god to have a yard in your stash.
  • Old Belt or pre made Purse Handles found HERE (the thrift store is a great place to find belts that can be re purposed)
  • Thread/Pins/Chalk
  • Ruler /Scissors
  • Sewing Leather Needles & Universal Needle
Pattern Pieces:

Step 1. Cut 2 Pieces of Main Fabric 22" x 18 and cut out  3x3" corners as shown below

Step 2. Cut 2 Pieces exactly as you did for the main fabric

Step 3. Cut 2 Lining Facings 22x4" as shown below

Step 4. Iron under 1/2" on one long edge of the lining facing pieces and place right side up on top of lining (the non pressed edge will be on the top) This gives the top of the lining structure and gives the inside of the bag a nice finish.

Step 5. Pin it in place.


Step 6. Sew down the facing to the lining at the bottom and top of the lining pieces, do this for both lining pieces.

Step 7. Place lining pieces right sides together and sew across the bottom as shown below using a 1/2 seam allowance and leaving a 4.5" opening at the bottom of the lining.


Step 8. Sew the sides of the bag linings tog there using a 1/2" seam allowance. The sewn lining pieces should look like the image below. 


NOTE: You will construct the main fabric pieces for the bag in the same manner as the lining EXCEPT you will NOT leave an opening at the bottom of the main fabric pieces.

Step 9. Press open the sides seams of the lining pieces as shown below.

Step 10. Now we close out the cut out corners by bring both seams together as shown below, pin it and we will sew it closed using a 1/2" seam allowance.


Step 11. Sew the corners, set aside and sew the main fabric pieces together.


Step 12. When you are done sewing both the main fabric and lining set aside and turn the main fabric inside out.


Step 13. Cut out 2 pieces of Interfacing or shaper measuring 15x6" then sew or glue both layers together for extra stiffness.


Step 14. Cut a piece of fabric larger then the shaper as shown so you can cover it. With the right side of the fabric facing you place the shaper on top and fold up 2" of fabric. Then fold the other side on top. Pinch one end of the fabric and pull out the shaper. Pin the edges together and sew the short sides.


Step 15. Once you have sewn the sides turn the pocket right side out and insert the shaper.


Step 16. Cut your belt so you have two handles. The length of your handles is up to you.


Step 17. Now grab the main fabric bag and measure in from each side 7" and make a mark. Then place the one handle and mark the width (as shown below) do this on both sides.


Step 18. Place the lining over the bag so that right sides are facing.


Step 19. Pin both layers together at the top. I like to pin were I made my handle markings so that as I am sewing around I know where to start and stop. We will NOT be sewing the opening for each handle.


Step 20. Sew all the way around except for the opening for the handles.


Step 21. Pull the bag out through the hole in the bottom of the lining to turn the bag right sides out.


Step 22. When you have your bag turned right side out press the top of the bag.


 Step 22. Mark the belt handle 5/8" from the edge so you know how far to insert the handle into your bag so that they are both even. Sew across the top of the bag going REALLY SLOW over the leather. Make sure you are using your leather needles. I was able to sew through the thickness on my hoe sewing machine without a problem. Do this for all 4 openings.


Step 23.  hand stitch the opening in the bottom of the lining, lace the shaper inside and you are all done!


Thursday, November 14, 2013

New cottons!

First I have to say WOW! We had an amazing day Monday. We're still busy packing all your fabrics and getting them shipped out to you. Thanks for all your orders. 

Second, I wanted to share with you a few new cotton and flannel prints that have come in recently. With the holidays quickly approaching I know blankets, PJ's, quilts, dresses, totes and countless other DIY's are getting ready to be started. I will try & post our new items frequently. Make sure you keep checking in so you don't miss them!

Enjoy!


Tuesday, November 12, 2013

The downstairs is coming together…a new bulitin board, a few pillows and my drapes (finally)

Hello home!

I know a few months ago I shared some of my house remodel with you all. We have been in for almost a year now and slowly I am starting to get the fabric in. I swear it's like the shoemaker's wife. Anyway, finally a few of the projects are done & I wanted to share them with you. If you remember, the entire house's color pallet was done off this beautiful cotton print, ML243870,  which I found in the store and loved. 
I decided to make drapes to anchor the main living space/dinning room and a pillow for the couch. The fabric for the taupe striped pillows was from a small roll I was lucky enough to find hiding in our home decorating store. It is a perfect compliment to the floral print and the couch color. 

Here are a few pics of Robin making the pillows. 

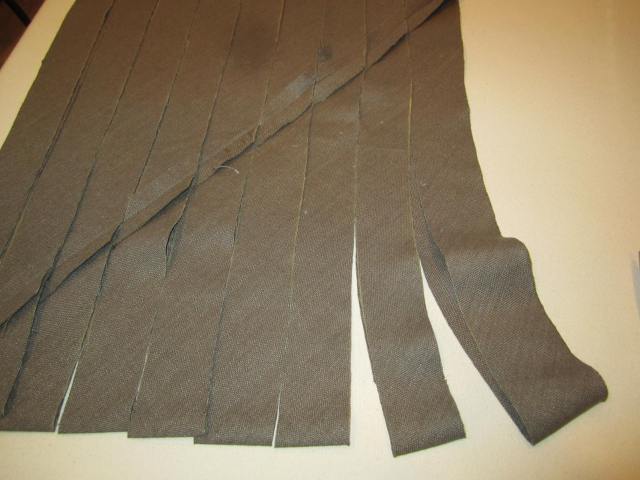
Making your own piping..
IMG_2319


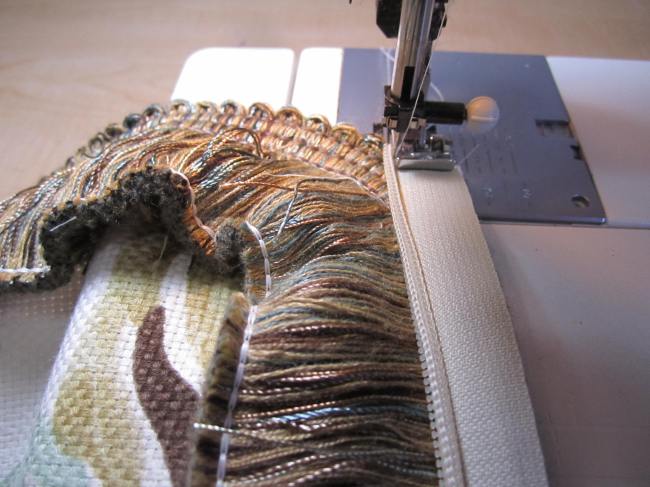
Sewing on the fringe..
Image

And here are the drapes…

To make pattern matching a bit easier, Robin used the sew through double sided wonder tape.

Image

That's a lot of fabric to pattern match!


 Here is the room after install yesterday. The drapes just tie everything together. 


(Sorry the color is a bit off from the lighting. The table is not orange at all and the walls are a grey taupe. I need movie lights! LOL!))

And the bulletin board…

Since I wanted to tie into the blues and greens from the main room into the kitchen, I picked this great damask print, but you can use most fabrics. It all depends on the look you're after. I love the French Stamp prints we have. It reminds me of the Restoration Hardware look. Really there is something for everyone on the site. I suggest the Home Decor section as the fabrics are a bit thicker, but a regular cotton print would work as well. Even an Ikat print would be fun.

Here is the space right after we installed it. So nice and clean. If only that was really how it looks.  


And this is how it looks once the family stuff goes back in. I have to say it is still pretty neat. Give it a few days and the kids will take over my work space. 


I now love walking in the back door and seeing this board. It just makes me happy. Next I'm off to find a paint color to add some color to the walls. 

Enjoy!


Sunday, November 10, 2013

And the winner is...


And the winner is…

Lipstick & Thread 

Congrats! You've won our fabric giveaway. 

Please e-mail us at followingfabrics@gmail.com  

by Wednesday, November 13th to claim your prize. 

Thanks for following us!

Thursday, November 7, 2013

A little Thanksgiving crafting...

Last week I decided I wanted to do a few crafts with the kids for Thanksgiving. We usually have lots of kids at Thanksgiving so I thought maybe I could find a craft they could do that would be good for multi age levels and not involve too many supplies. I came across two that I liked.
The first one is from Kate at
These little turkey pom poms looked perfect for my 6 year old. All I needed was felt, a glue gun, pipe cleaners, googlie eyes, and a skein of yarn. Sarah & I decided to test them out today.

      
Always read the directions first. This is not something most 6 year olds want to do, but we got through it. LOL!


Making the pom pom.


Tracing her hand.

Sarah's turkey!


This project was really simple & fun for Sarah. She did need some assistance, but if you have a teen  cousins around they can easily assist. If you really wanted to be crafty, you could make them ahead of time as place holders. The table would look super cute with one of these pom poms of each guest napkin or plate. Sarah wanted to write her name on each finger. I'm sure she would have loved a few foil embellishments to decorate her turkey. This craft is a winner if you need to keep kids busy before the turkey is served. Sarah gave it a thumbs up. To find more detailed directions click here

The second craft we tried out today was created by Lisa Storms. This no sew project was a little too hard for my 6 ear old, but I think most 8 year olds would be fine. For this project you need felt, polar fleece, and some stuffing.


Making the template.
            

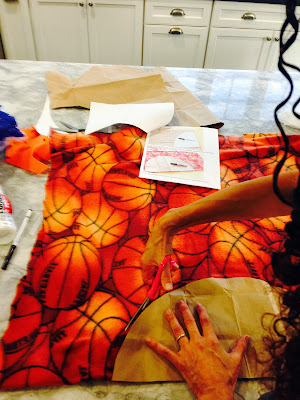
Cutting this basketball fleece I found at The Loft. The colors were perfect so I got it. I'm hoping once it is cut & tied the basketballs will be less noticeable.

Holding the smaller template in place to cut the strips.

After tying, stuffing, and cutting a few pieces of felt here is our turkey. I think I may make a larger one as well. They will look cute together on my mantle. 

Click here for the template and more detailed directions.


Enjoy!