Friday, March 16, 2012

The Art of Indonesian Batik graces Michael Levine's and LowPriceFabric.com!

This week we highlight one of South-east Asia's most notorious textile arts, a method known as 'Batik', which uses a wax resist technique to create multi-layered print designs on various types of cloth; most commonly silk or cotton. I have been lucky to work first-hand with various batikers and visit batik factories in Bali, Indonesia, and gain an understanding of the detailed precision required to create these magnificently patterned textiles. I'm even more lucky that I get to write another blog entry about a place and textile art that I deeply love. Cheers to sharing some of my knowledge with you in celebration of our National Quilting Day Sale - where you'll find all of our Quilting Cottons (including the newly added Batik section) 20% OFF!
You can take advantage of these savings both online and in our downtown Los Angeles store on Quilting Day, this Monday, March 19, and for an additional two days on our website only, at www.LowPriceFabric.com.
Now for a little story about Batik...
Humble Beginnings:
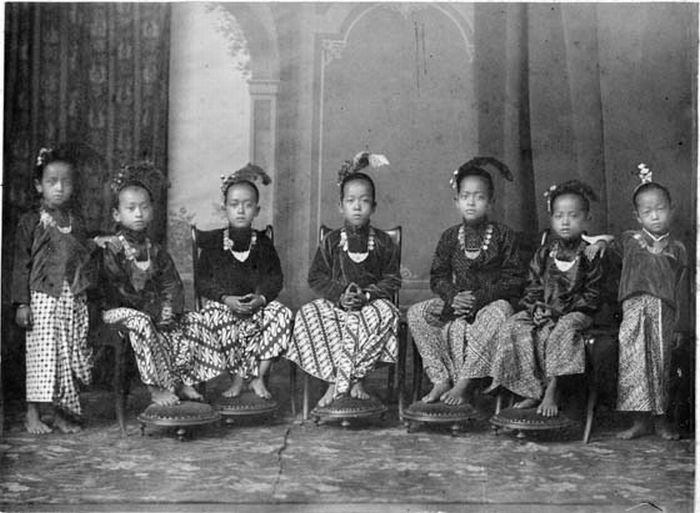
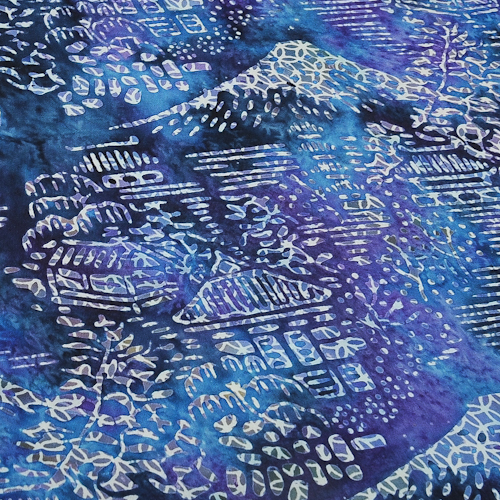
The word 'Batik' is thought to have come from the Javanese amba ('to write') and titik ('dot' or 'point'). The art form predates written Javanese records, and is thought by some to be a native tradition. Commonly, a mixture of beeswax and paraffin are used to create the resist area of a design. The beeswax holds the design to the cloth, and the paraffin has a tendency to crack, which is a stylization characteristic of batik. Here is an example of the spiderweb effect created by the cracked wax:
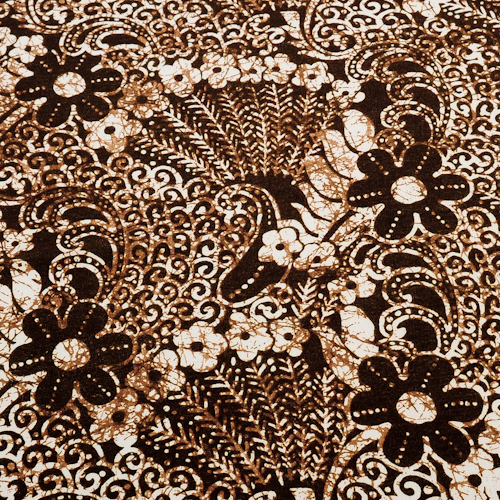
This is a sneak peek at one of our new swimwear fabrics, available soon, in a print made to look like batik.  Although it is not a real batik, it illustrates very well the crackled look that is characteristic of many batiks.

There are two main batik-making techniques:
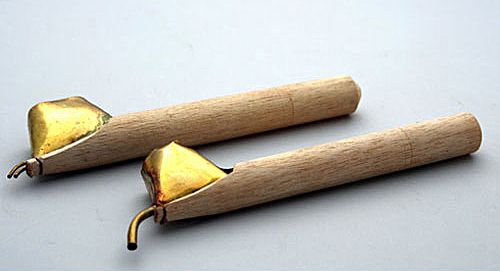
The first, original type and method of batik, is called batik tulis, or written batik, and entails drawing a design freehand onto the cloth. It is a very time consuming method and was originally done mostly by women. Batik tulis is made using a wooden or bamboo handled tool with a tiny metal reservoir, and out of it the wax seeps, through a very tiny spout. This needle-like pen is called a canting (pronounced "chonting"), and looks like this:
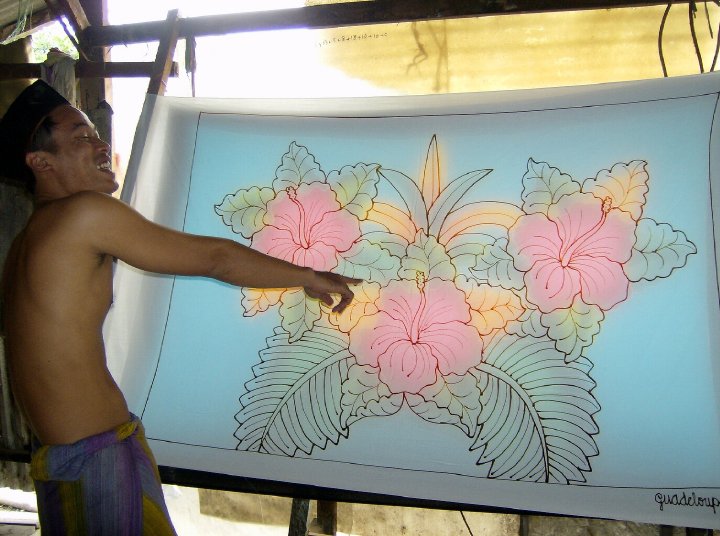
Today, the batik tulis method is still used for designs of a freehand nature. Here is a picture from my last trip to Bali, where we visited a batiker replicating this floral sarong. You can see how the untreated cloth is stretched above the template and then the outline is "traced" in wax onto the blank sheet:

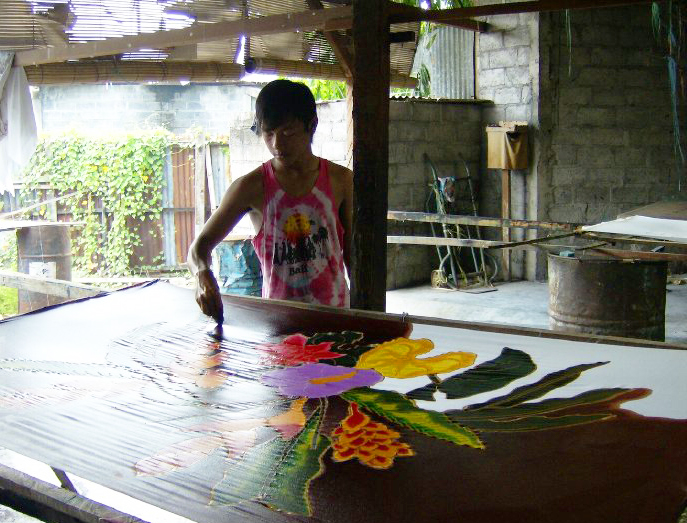
Here, after the wax has been applied and dries, dyes are painted on the cloth, into the wax-segregated areas of the motif:

After the dye has been placed, the cloth is then placed in the sun. One batiker told me (and I'm sure this depends on the types of dye used) that the brightness of the sun dictates the intensity of the finished color. Interesting, right?

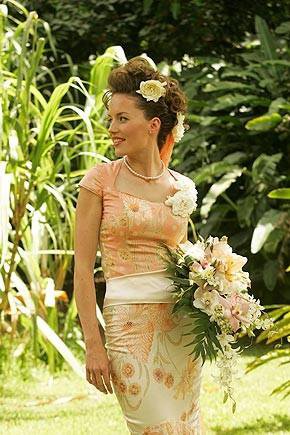
Here is an example of some exquisite silk batik tulis that I bought in Bali, made here into a beautiful wedding gown:
 The secondary method, batik cap (pronounced "chop"), or stamped batik using copper blocks, was developed much later, in the 20th century, when production facilities faced a need to mass produce the detailed designs that would take ages to turn out using the traditional canting. Due to the labor intensive nature of this technique, batik cap was mostly done by men. Batik cap has a repetitive nature to the print. The batiks that we have just added at www.LowPriceFabric.com have all been made in this stamped manner. Here is an example; one of our many new additions:

This material started out as a plain white or natural colored cloth. First, the light floral pattern you see within the design was stamped in wax. Next, the cloth was tie dyed, if you will, a pale, mottled blue/purple. The color was processed, rinsed, and then the wax removed, either by washing in hot water or by ironing between sheets of newspaper. Next, the cloth was stamped with wax again, this time in the volcano and house pattern. Then, dyed again in the same colors/manner as before, but this time salt is thrown at the cloth, creating the "fizzy" texture within the color. The dye is processed, rinsed, and then the wax removed again. This is what you call a double-process batik. The more processes it goes through, the more expensive the finished material will be. Some batiks have as many as three or four processes, or "layers," to the design.

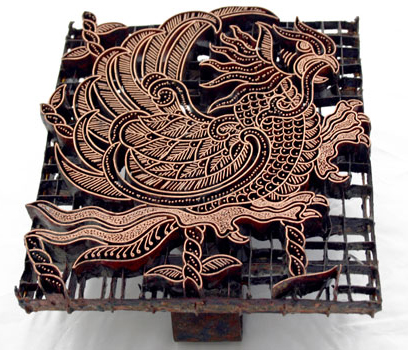
This is what the cap, or batik stamp, looks like, made from sculpted copper. These stamps are masterpieces in themselves, and a new one (often custom made) will come with a high price tag of at least a couple hundred dollars. That is why batik stamps are often passed down and around, and it isn't uncommon to find them for sale second hand. The craftsmen who create these stamps have a career entirely in itself. The stamps are dipped in a reservoir of hot wax kept over low heat, and applied to the cloth in a block printing method, at just the right temperature:


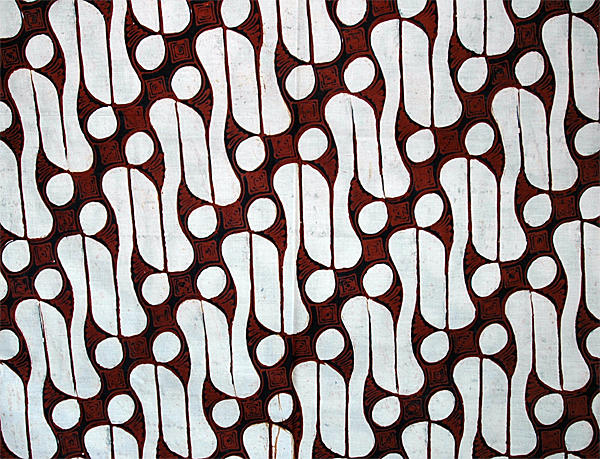
Other than the two methods by which it is produced, batik can be further sub-categorized by the style and design motif itself. To keep this from becoming a full on dissertation, I'll show you just one; my favorite, unmistakable pattern is Parang Rusak, or 'broken knife'. This style of batik pattern was originally reserved for royalty, for in historic times, ordinances were passed in the ruling centers of Java dedicating certain batik patterns as 'only wearable by members of certain status or relation to the sultan.' The differences in rank between members of the sultans' families and high officials could be easily determined by the batik pattern one wore. Commoners were expressly forbidden to wear these designs:
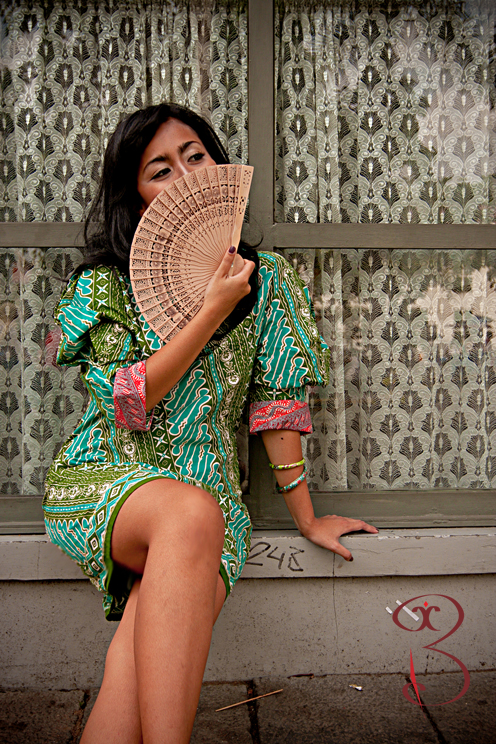
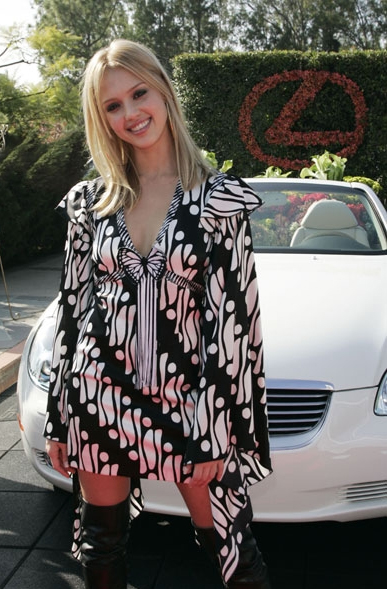
I thoroughly enjoy seeing such a traditional pattern and textile show up in modern fashion. Here are two images of Parang Rusak batik popping up in the western fashion scene:
Here, Jessica Alba arrives at a charity event in a very familiar print:

Another common use for batik in the United States is for quilting. Many quilters enjoy mixing in a few batik quarters here and there, or some will even do a full quilt entirely of batik, featuring some sort of rainbow spectrum gradation. Just google images for 'batik quilt' and you'll turn up dozens of examples/ideas. Our selection of cotton batiks would be perfect for quilting, as we have shades of pink, orange, yellow, green, turquoise, blue, purple, and black:
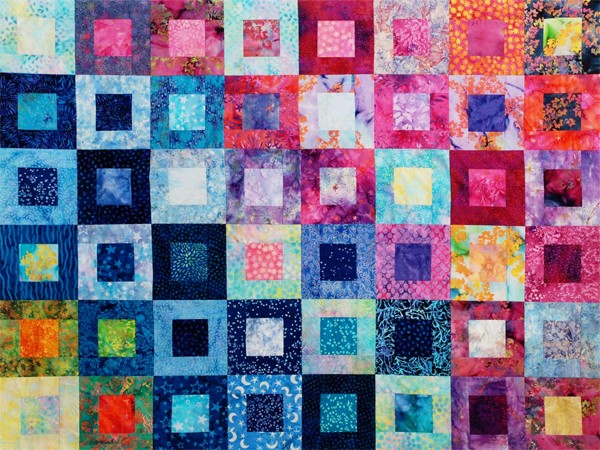
Given the age and history of the art form, batik has certainly become the traditional cloth of the Indonesian people. It is worn for temple and ceremony events, used in most hotels and tourist attractions, placed in the home, and often salvaged and sewn up into patchwork blankets. And now, flight attendant uniforms on most of Southeast Asia's major airlines feature a "batik" looking printed cloth to replicate the traditional textiles of the region. What makes batik so desirable and interesting is its beauty, and the fact that it's made by hand under very traditional methods, without the need for industrial machinery or equipment. The techniques of old are still very much alive, and you can see from my photographs that the words 'primitive' and 'modern' are interchangeable when it comes to batik factories! The batiks we are selling online have all been made by hand by the artisans of Bali, Indonesia and imported by Hoffman of California. It is most pleasing to me that through the sale of these batiks, we are supporting and advocating the awareness of such a rich, creative culture and traditional textile art. I love batik and I hope that your experience with these textiles will open one door that leads to another, and that you may continue exploring and discovering beautiful batik textiles.

Thursday, March 8, 2012

Natural Selection: Michael Levine & LowPriceFabric.com unveil a new collection of natural fiber home decor textiles, and this weekend our entire Home Decor Section is ON SALE!

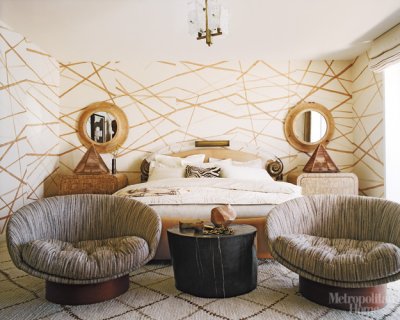
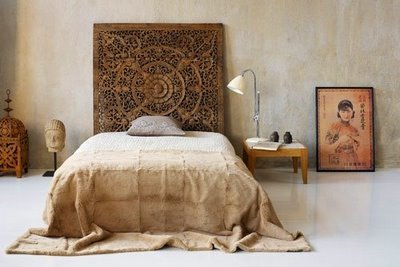
For a long time I have been highly attracted to raw and unbleached, nearly unaltered natural fibers like linen and silk, in earthy palettes of warm, neutral tones – they seem to relax people. Whether it’s the serene nature of these materials, or the influence of Asian aesthetic 's simplicity, I find natural textiles to be one of the earth’s 'natural wonders'. The fact that natural fibers are gifts of mother nature and need very little alteration from mankind - to be the sumptuous yet very basic indulgence that they are - is sublime. When I visited South-east Asia, I discovered a look that was very much rooted in the natural, uncluttered approach that we westerners call Zen.  The trend in Asian decor, I noticed, was to mix the natural with a contemporary, modern, and refined minimalism, much like this:

This style is popular in newer, Southeast Asian construction.So, as a fan of and advocate for natural fibers, you can imagine my blissful excitement when the owner delivered to us a forklift load of new tussah silk and linen home décor textiles to put online! If this realm is new to you, I'm here to help you justify the shift into an environment that's more free from synthetics! As I passionately write and edit this post, I'm very excited to share some extra good news with you... these new textile treasures we're about to shine light on - as well as our entire Home Decor Section - are ON SALE, discounted 20% OFF, THIS WEEKEND ONLY! So have a look and stock up, because this bargain won't last long, and surely can't be beat!


By now you're probably questioning "How to mix this raw, exquisite texture into my space?"
Let me tell you, have no fear. Whether it's a little or a lot, an earthly reminder of our outdoor world is always a welcome presence. Shizen, or Naturalness, is one of seven underlying principles of Zen, and really is the pith of this article; appreciating the unpolished stone, the untreated wood, and of course the raw fiber of a plant or insect, woven into immaculate textiles.  You may find yourself surprised at the understated yet complex beauty of this new collection!
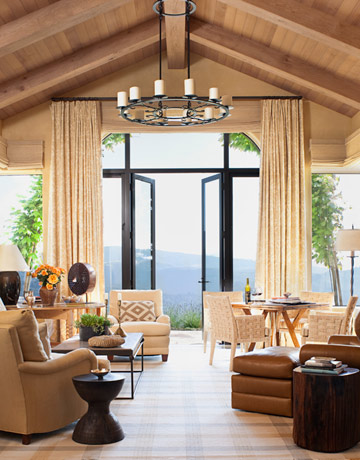
So to apply this principle aesthetically is really not hard. Take this grand architecture and these warm and inviting natural wood tones, and accent them with long and wide, uncut panels of full-length, floor to ceiling curtains! How glorious are these tapestries? I have to say they are almost taking center stage, aside from the mountain views:

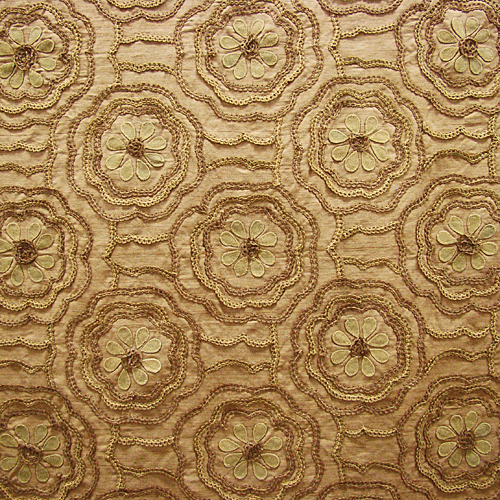
Our new linen and silk blend 'Damascus' is a perfect candiadte for this starring role:


Damascus - linen and silk blend in a natural, earthy texture, embellished with appliqued rope, wooden beads, and brass adornments in a Moroccan-style motif. Shop all of our natural or silk home decor textiles by clicking.

Another idea is to make the cloth into a sumptuous bedspread or duvet cover. A great thing about natural fibers, linen particularly, is that it is breathable, so you won’t be waking up clammy. A silk or linen duvet can be used empty in the summer or filled in the winter, and will always keep that organic look – even if your comforter is filled with micro-fiber!

Here’s the idea:


And the top pick for creating this look:


"Dubai" - 100% Silk in Natural with vertical, beaded rope stripes (also available in Dark Natural)

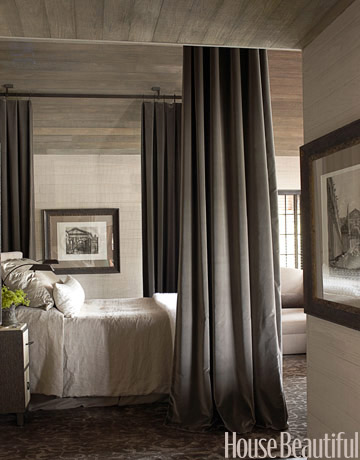
The third use of these amazing textiles can be a combination of the first and second; I found a few photos online of perfectly executed bed prosceniums using the "floor to ceiling" curtain idea:

You could use any of our new Armani Linens to recreate these fine, solid linen drapery looks. They will also be on sale through Sunday March 11th! Add an amazing natural feel, luxurious drape, and privacy, of course, with our array of 14 modern, muted colors.  You're sure to find one of these Italian designer linens to suit your space and style!

If an embroidered or embellished linen is more your thing, like the example shown below, we've got a number of these also!


This one, called Isis, is just beautiful and would easily add a lot of class to an earthy bedroom suite:


And now finally, although there are still so many more options and ideas to explore, I've saved my favorite for last. This is the appeal of a motley array of high contrast, color and texture combinations, all orbiting around the natural, light quality of this room. Take this Northern-European spin on Shabby:

A bright, white space becomes a homey, lived-in space. As Regina here at the office says, "Can I move in?!?" I love this photo and style, showing a collection of cultural treasures. You can see that they each have their own story to tell. Some of our new natural home dec textiles could easily step right into this scene without skipping a beat! You have to use your imagination on this one, since they're not in the picture yet - but centered around this grande, wood-slab coffee table, and tossed in with the primitive woven textiles and artifacts, you can see what I'm getting at. Nature incorporated! The rich quality of Joyous, in either Chocolate or Tan, adds an interesting, dimensional texture and really emphasizes the organic. Imagine a throw pillow or 'flower wall' in this mix!


So now that I've given you a few ideas to play around with, exercise your own imagination within the space you've got. I can guarantee there's at least a little room in every house - pun intended - for some natural selections to reveal their understated beauty! Be sure to check out our Home Decor Textiles 20% Off Sale, this weekend only, where you will find many more styles and a much greater selection than what we've only just touched on here! Enjoy!

Friday, February 24, 2012

Cutting Your Own Bias Tape Made Simple - Plus an Easy Baby BlanketTutorial!

We want to share a simple baby blanket tutorial with you. It features a phenomenal trick for cutting your own bias tape! This method works great with a rotary cutter, and with a little "origami-know how", it allows you to simply make bias-cut blanket edging from your own choice of decorative fabrics!

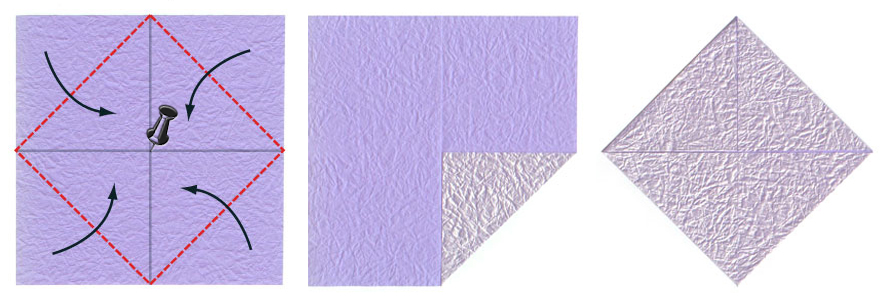
First we'll start with the bias tape. Begin with a large square piece of fabric. Most quilting fabrics are 45" wide , so to get a square piece you'll want the length to be 45" also, or 1-1/4 yard. Either way, just make sure that the length and width of the fabric you are using are equal lengths. Cut edges should be squared (90°) with the selvedges.
Step one: Find the center of the square. You can do this by folding the fabric in half twice (see grey lines) and marking their intersection with a pin. Step two: Fold corners inward, to meet the centerpoint.
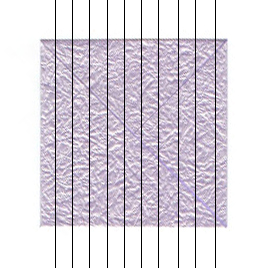
Next, rotate your fabric 45 degrees so that it is a square in front of you, rather than a diamond, and use a rotary cutter and straight edge to slice strips. These strips are now naturally cut on the bias!
We used 1-1/2" wide strips, with 1/4" seams, and it yielded a 1/2" wide border.


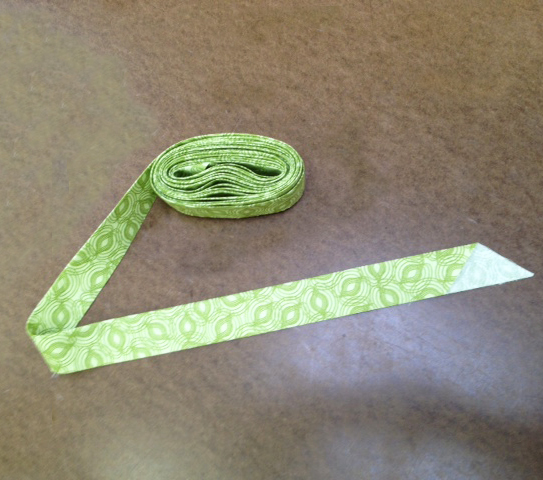
To prepare your new bias tape for application, press it in half lengthwise, like this, and it's ready to go. A yard and a quarter of 45" wide material will yield more than enough bias tape for a 45" x 45" blanket. You may have to do some math for other sizes and uses, as we haven't created a formula yet! :D
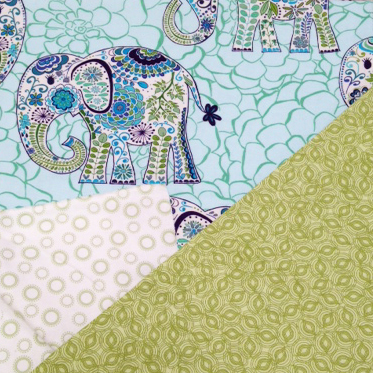
Now for the blanket itself. You will need two large, square pieces of fabric, plus any batting or lining you choose to put in between. For this tutorial we chose the new Karavan Collection, from Free Spirit by Valori Wells, plus two accent materials, the green one being for the bias trim. But we also have an expansive collection of other quilting cottons here.

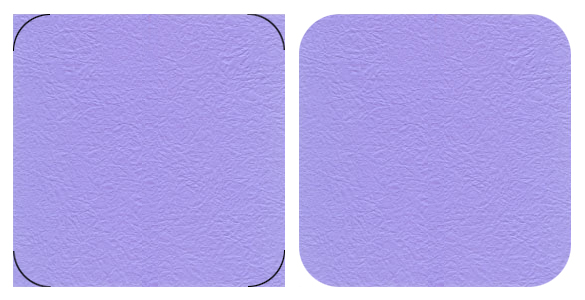
Sandwich the batting between the two blanket fabrics, right sides facing out, and pin. Use a circular object (like a saucer or a glass), and mark rounded corners; then trim. This cuts out the work of beveling or folding bias tape at corners, so you can just curve right around those edges with your curve-friendly bias tape!
Now, quilt the fabric as you like, stitching through all three layers. You can quilt along the printed pattern on the cloth, or rectangular shapes, triangles, zig-zags, swirls, flowers, spirals, or vertical lines. You can hand quilt, or use sashiko thread and use big stitches. Just remember that this quilting is only being used to keep those three layers together and in tact, plus it can be decorative and attractive.  Make sure your layers haven't shifted; if there are some threads or a little unevenness, now is the time to trim the edges.

The last step is to attach your bias tape. Now there are so many tutorials on the web (YouTube, for one, is a great resource), I am going to link you to this one here (just ignore the part about beveling the corners, because we rounded the edges a few steps back) and I'll wait for you here and then carry on with the rest of my tutorial when you get back... some hand stitching will be required but if you minded that, you wouldn't be a quilter now, would you?!? ~Wink Wink~

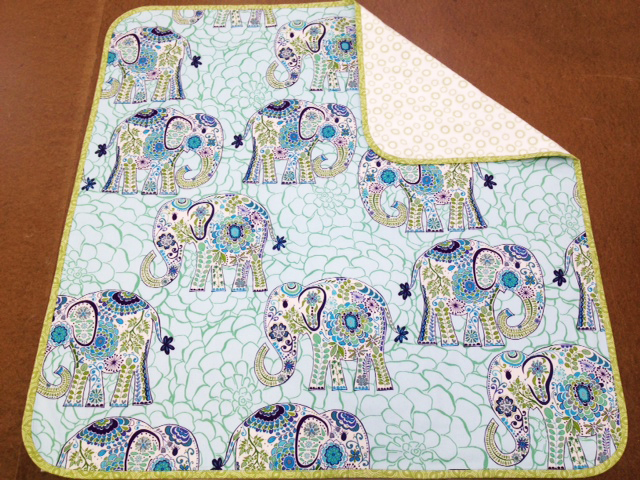
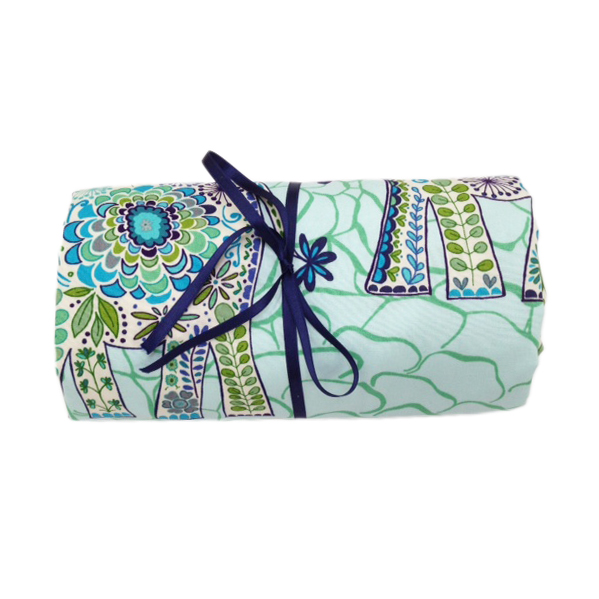
Once you've put on your bias tape, you've got an attractive and tidy little blanket to bundle up some joy in! This is an easy and personalized project.  For a baby shower, tie this up with a nice piece of satin or grosgrain ribbon and you can forget about those gift registries!

Wednesday, February 15, 2012

Michael Levine's Special Kona Cotton Solids Sale for Online CustomersOnly!

Now is a great time to shed some light on the ever popular Kona Cotton, a staple broadcloth material amongst quilters and crafters for it's universal appeal and large spectrum of colors. This weekend we'll be having a sale online on all of our Kona Cotton Solids, so we wanted to share some ideas and pictures.


In case you are unfamiliar with broadcloth, it is characterized by a dense weave, which lends itself to sturdiness and long term durability. So as you can imagine, quilters choose this material for its ability to hold up to many washings and time, as quilts are traditionally handed down through families and generations as long lasting heirlooms. Not to mention the fact that it is 100% Cotton. If you know me well enough by now, you know that I am a huge advocate of natural fibers, especially for worn or slept-in items. I think blankets qualify. Nobody likes waking up clammy or damp. A material like Kona Cotton will give you the vibrant colors and long-term durability, paired with the added benefit of being a breathable, natural fiber that will ensure a comfortable sleep.

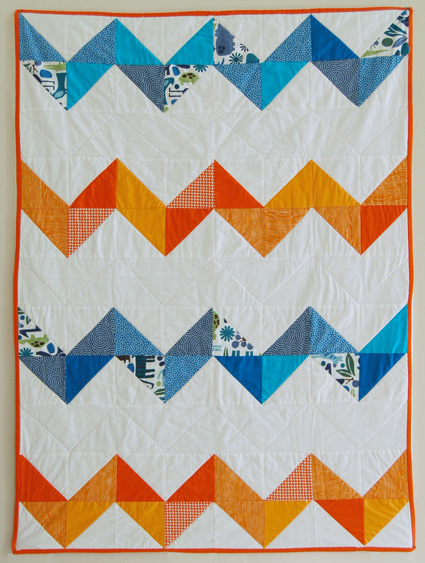
There are a ton of online tutorials and quilt patterns if you'd like to try your hand at a Kona Cotton Quilt. The most elaborate designs use analogous colors to create dimensional and gradated patterns.  This one here is an interesting take on a classic chevron. I like the simple instructions drawn out on graph paper, very clear:


Another notable, somewhat retro, design using Kona Cotton can be seen here. Or the Shattered Rainbow,which is here. The possibilities are endless. Just do an online 'image' search for "Kona Cotton Quilt" and you'll be overwhelmed by choices.

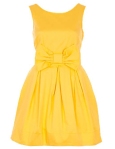
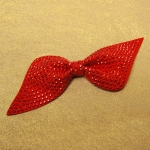
But you aren't only limited to quilts with Kona Cottons, I imagine them working wonderfully in both children's garments or women's dresses and skirts. And as the examples show, Kona Cotton works great for making bows and other semi-rigid items. You can also use a Kona Cotton Solid for any of the components in our pillowcase blog or the potato bag blog. Here are a few photos of garments that could easily be replicated using Kona Cotton Solids as the main fabric or contrast:
    

Whatever you decide to do or make with the Kona Cotton, it's bound to yield pleasing results, and this weekend is a great time to stock up during our Kona Cotton Solids Sale!

Tuesday, February 14, 2012

Look Who Visited Michael Levine's - Marcy Tilton!

Earlier this month I had the pleasure of meeting long-time designer and sewing world celebrity Marcy Tilton. Although I didn't realize at the moment 'who' she was, when Marcy handed me her business card the name rang very familiar... I later realized Marcy's name was famous to me from her work with Vogue Patterns. Aside from designing patterns, Marcy blogs and hosts a variety of workshops, classes, and tours - among them an exciting trip to Paris' left bank in May 2012, suitably called 'Paris Tilton!'


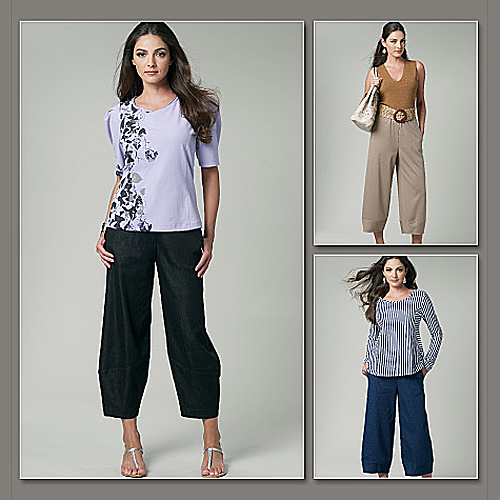
What I love about Marcy's patterns is that they are all any-age appropriate, and if you've got an eye for classic styling and cuts, you will appreciate them. We've just recently added a nice selection to www.LowPriceFabric.com.  My 'Top 3' favorite Marcy Tilton patterns are these:

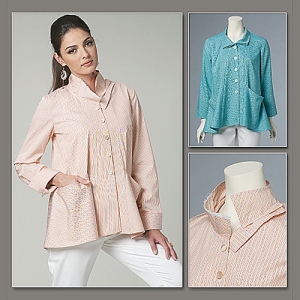
This asymmetric top/jacket (appropriate for all ages, and would be cute lengthened as a trapeze coat-dress!):


These cropped trousers (suitable for any woven fabric and so easy to pair up - you could dress these up or down, night or day! Plus there are three style variations):


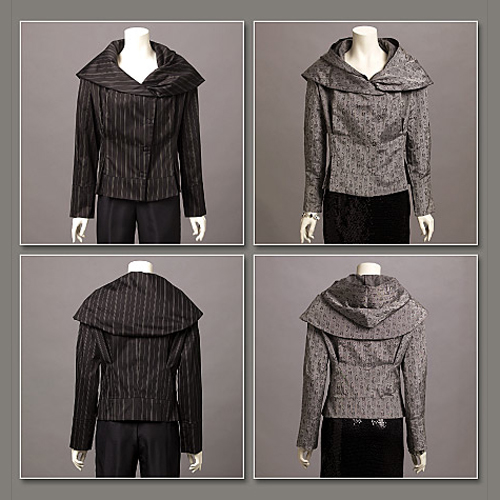
And this asymmetric urban jacket (with so many different fabric options, it's easy to get excited about it!):

It's always refreshing to meet creative people who have found success doing what they love and who are just as interested in others' work as their own. Marcy was very kind and intrigued by our operations and endeavors here. I highly recommend reading Marcy's dissertation on fabric shopping, full of practical tips, found here. I hope you will pay a visit to our section dedicated to Marcy's patterns; I'm sure you'll find one that strikes your fancy. And who knows, maybe one of you will end up meeting Marcy in Paris!

Tuesday, February 7, 2012

Michael Levine's Sweetens the Deal: Low Price Valentine's Crafting Supplies and Valentine's Day Projects!

Valentine's Day and the month of February is always the time of year that we reflect on love and the special people we've been blessed with in life. Although many people would argue that Valentine's Day is a Hallmark holiday, that could be said for any holiday. The true values of a celebrated day are becoming more and more clouded by the commercial world. Crafting, however, and making gifts from your heart are a sure way to hold onto what's real and meaningful on Valentine's Day, and what is priceless and cannot be bought: LOVE.

I'd like to share a couple of projects I've come across or made myself, that are prime examples of a perfect Valentine. You don't even have to make anything functional; throwing together some nice materials in an artistic way with a lovely sentiment attached is really all you need to show somebody your admiration.

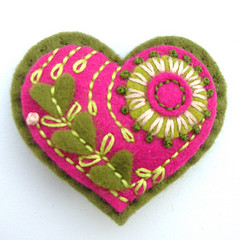
The first idea comes from Designed by Jane, and was featured on my previous blog entry about felt:
I just think this is so adorable and every little stitch and detail shows dedication and time. You could very easily embroider a sweet message onto the back - and voilà! Love delivered! You can shop our collection of eco-friendly felt, perfect for a variety of holiday crafts, here.

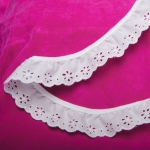
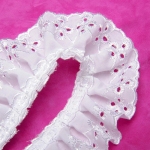
My next suggestion is something for the kids. My mother always supervised the making of home-made valentines for us to distribute to our classmates. Heart shaped doilies, Valentine's fabric, some lace trim, red and pink construction paper, pinking shears, a bottle of Fabri-tac, and perhaps a little glitter is all kids really need to get crafty and show some love to their classmates. When I think of store-bought Valentines, I think of that song "Can't Buy Me Love." There's just so much more dedication and affection that come with home-made Valentines. Plus, kids will love crafting their own Valentines, it will keep them out of your hair for an hour or two, and every one is happy! These are just a few of the many Valentine's items we at Michael Levine's have just added to our online store, www.LowPriceFabric.com!

      
Another idea comes from my previous blog about Personalized Pillow Cases. It would be very easy to adapt this project and incorporate some of our Valentine's Day Fabrics and possibly use some of our eyelet trims instead of piping. You could even tie it up for presentation with one of our decorative ribbons and top it off with an adorable Cupid Brooch:

      
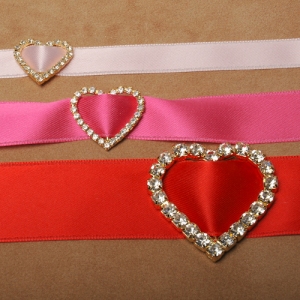
One more thing for the kids - or anybody for that matter - is a simple ribbon bracelet accented with a 'diamond' heart charm. You could add a clasp and it's done!
This last project - I cannot take credit for, but - is certainly worth highlighting, is this lovely Heart-Shaped Mailbox for Valentine's Day deliveries. This is a great idea for kids or teachers who want a fancy little place to receive their Valentines.
Again, this project would be a nice use for many of our Valentine fabrics (some are priced as low as $4.00 a yard!), and you could always trade out the scalloped edge for some lace or eyelet trim!
      
So whatever your Valentine's Day plans are, and whoever receives your affection on this special day of love, hopefully you'll find a place in your heart for some good, old-fashioned meaningful home-made gifts! And if not, if Valentine's Day just isn't your thing, you can always show some love for Arizona, whose Centennial Celebration of Statehood is this February 14!